 Maybe you’ve heard of the HTML 5 Canvas API, but don’t know what it’s good for…? Maybe you’ve heard that it’s the way to go if you want to code an HTML5 game? Or maybe you’ve heard that it gives you explicit control over drawing in your browser? So what does all that mean?… Just what is the HTML5 Canvas API?
Let me pull back the curtain a little for you and give you some insight into what the HTML5 Canvas API is all about and what it can do for you and your web apps.
In this article, I’m going to give an introductory overview of the HTML5 Canvas API. The sample application that comes with this article, “Canvas Playground”, gives a number of canvas drawing examples and even lets you interactively play around with the Canvas API. Give it a try.
The HTML5 Canvas API is a procedural drawing API for JavaScript. It’s well supported in all major browsers including Internet Explorer (starting with version 9) and is defined by the HTML5 Canvas W3C specification. The Canvas API is a vector-based drawing API and should feel pretty familiar to those with exposure to graphics subsystems such as Quartz or GDI+. But to those folks with less exposure the API may feel a bit overwhelming. Here are just some of the capabilities at a glance:
- Defining Paths with lines, curves, arcs and more…
- Filling and Stroking Paths
- Clipping to a Path
- Filling and Stroking Text
- Affine Transformation (Translate, Scale, Rotate, Skew)
- Fills using Gradients and Patterns
- Pixel Manipulation
- Offscreen Rendering
- Rendering Blurred Shadows
- Dashed Lines, Line End Caps and Joins
- Exporting Canvas Rendering to a PNG or JPEG
If all of this sounds a little foreign to you don’t worry. Coming up I’ll touch on a few of these capabilities and show some concrete examples to give you a feel for the API and how it works. First of all the HTML5 Canvas is a browser DOM object and can be added to your webpage either declaratively through the <canvas> tag or programatically through the createElement method. Once defined it contains a framebuffer bitmap at screen resolution that is the same width and height of the canvas object itself.
<canvas width=“640” height=“480”/>
Adding this tag to your HTML page will create a canvas object on your page that is 640 pixels wide by 480 pixels high and will be transparent. The DOM object associated with the canvas object doesn’t directly have any drawing methods. In order to actually draw on the canvas, you have to obtain a drawing context object by calling the canvas’s getContext method with a string parameter of “2d”.
context = canvas.getContext("2d");
The context object returned contains the actual drawing APIs that allow us to draw on our canvas object. Let’s give it a try. The following code snippet shows how to get a reference to a canvas object on a page, get a reference to it’s 2d context and draw a red filled rectangle on the canvas.
// Get a reference to the canvas object
canvas = document.querySelector("canvas");
// Get a reference to it’s 2d drawing context
context = canvas.getContext("2d");

// Displays a filled red rectangle on the screen
context.fillStyle="#FF0000";
context.fillRect(50,50,100,150);
Next lets look at drawing some more interesting shapes. Outside of a few convenience methods for rectangles almost all shape drawing is done through the use of Paths. So you might be asking yourself… What the Heck is a Path? A Path is a collection of lines or shapes (possibly disconnected) that once defined can be either filled or stroked. Let’s look at a quick illustrative example.
// Define a path in the shape of a triangle with the moveTo and lineTo methods
context.beginPath();
context.moveTo(400,50);
context.lineTo(50,400);
context.lineTo(400,400);
context.closePath();

// Fill the path
context.fillStyle="purple";
context.fill();

// Stroke the path
context.strokeStyle="blue";
context.lineWidth=7;
context.stroke();
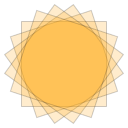
This code defines a path in the shape of a triangle and then goes on to fill the path and then to stroke that same path. Let’s walk through this line by line. The graphics context maintains a current path as a part of its state and calls to certain methods will accumulate either lines or shapes into the current path. in the first line of code, a call to beginPath clears the current path from the context so that we start with a clean slate. The context object also maintains a current “pen” position that is used to help define a path. This pen position can be changed with the moveTo method which simply sets the current positon of the “pen” to the provided x and y coordinates. The lineTo method uses the current pen position as a starting point and the provided x and y coordinates to add a line to the current path. The current pen position will be updated to the point at the end of the line. The next lineTo method call uses the current pen position and the provided x and y position to add another line to the current path. The next call to closePath will close the path by adding a line from the current pen position to the point that started the current path. We have now defined a path that is in the shape of a triangle. But it’s important to note that even though we have defined a path, nothing has been drawn to the canvas. A path really just describes a set of lines and shapes. Now that we have defined path, the path can be either filled or stroked to actually do the drawing. The fill method will fill the interior of the path with the current fill style. By default the fill color or style is set to black. To specify a different style we can use any CSS color value. A few examples of valid color values: “red”, “purple”, rgb(255,255,0), rgba(255,255,0,128), #ff00ff. In addition to filling a path, you can also stroke the path which will outline the shapes defined in the path with the current stroke style which can also take any valid CSS color value. To change the width of the stroke, you can specify a pixel width for the stroked lines with the lineWidth property. You can play around with these values in the Canvas Playground App by loading the “polygon sample”. Next lets look at the “circle” example.
// Define a path in the shape of a circle with the arc method
context.beginPath();
context.arc(320, 240, 150, 0, 2*Math.PI);

// Fill the Path
context.fillStyle="orange";
context.fill();

// Stroke the Path
context.strokeStyle="green";
context.lineWidth=15;
context.stroke();
This example demonstrates that paths aren’t limited to lines or polygonal shapes, but can also include arcs or circles. My sample application goes on to show a few more slightly advanced examples and lets you interactively tweak the code. Take a look at the full canvas specification and experiment. If you liked learning a few basics about the HTML5 Canvas API but are hungry for more… This really is just the tip of the iceberg… My upcoming ebook, “Essential Canvas for HTML5” will cover the subject in depth. Just drop your email into the form below so that I can let you know when it’s available.
Take a look at my sample application as it provides a live demonstration of all the examples shown in this article as well as a few more slightly advanced ones. The full source code for the article can be downloaded here.
Comments are closed.